Pages

Tuesday, October 21, 2014

Small Things

 
Just a little friend I found, that gave me joy.


Hearer of prayer, to Thee all flesh cometh.
Matters of iniquities were mightier than I, Our transgressions -- Thou dost cover them.
O the happiness of [him whom] Thou choosest, And drawest near, he inhabiteth Thy courts, We are satisfied with the goodness of Thy house, Thy holy temple.
By fearful things in righteousness Thou answerest us, O God of our salvation, The confidence of all far off ends of earth and sea.
Establishing mountains by His power, He hath been girded with might,
Restraining the noise of seas, the noise of their billows, And the multitude of the peoples.
And the inhabitants of the uttermost parts From Thy signs are afraid, The outgoings of morning and evening Thou causest to sing.

Monday, October 20, 2014

Fat fatty fats

I love fat. I don't want to BE fat, of course. Who does? Fortunately, thus far, I have found that consuming copious amounts of good, pure animal fats has done very little to increase my waistband.

Lack of exercise, on the other hand.....ahem. But that's a different story. ;P

I love eating fats. They make me feel more...solid. Strong, but on the inside. I've always been a bit, shall we say...wispy. "Petite", they used to call me as a child. I'm about the size of a small 12 year old, given the fact that I kind of stopped growing when I was 12. In two of my pregnancies I have struggled to gain and keep weight on, and now that I am breastfeeding my third son (18 months postpartum), I find I am only about oooohhhhhh seven-ish pounds heavier than I would prefer to be.

It's the boobs, you guys. It's all in the boobs. Seriously.

ANYWAY. All that to say, don't be afraid to eat fat! That is to say, good fat. Good fat doesn't make you fat. If your body can digest it, process it, and poop it out, it's not going to stick to you and cause you pain. If it's rancid, adulterated, or otherwise toxic, it's going to get stuck in all kinds of places and wreak havoc on your poor innards. Stick with the good stuff. Home-churned raw butter. Self-rendered tallow. Bacon grease from pastured bacon. Yeeeeaaaahhhhh baby.

No canola oil, you guys. Just don't. Don't. No.

Butter. Tallow. Bacon grease. Lard. Oh yes.

That's right, I said it. Lard. Don't be afraid of your porcine friend! Laaaaaaaaaaaarrrrrrd. Frrrrrrriiiiiieeeeend. Truuuuuuuussssst Meeeeeeeeee.....(are you hypnotized yet?...)

Fats make food worth eating. And hence, life worth living.

My logic is undeniable.

I love my logic, don't you?

So. Now that you're all ready to dive into the wonderful world of delicious, savory fats, here's a quick tutorial on rendering said animal adiposity.

First, get some fat from your local butcher. You can try to be all fancy by asking them for "tallow" or "suet", but they might just look at you and be confused until you say "er...you know...the extra FAT.", at which point they might just say "ooooohhhhhh the extra fat! yeah sure, here, have some for free!"

Or they might charge you a dollar for like ten pounds of the stuff. Or they might charge $1 per pound. I dunno. It seems to be sort of arbitrarily decided in my neck of the woods. Maybe butchers have frequent mood swings?


Step One! Chop it up with a big knife. Preferably a heavy knife that you can really lean into. If the fat has been frozen like mine, it can take some effort to break up.


Step Two! Toss it in a crock pot. Cover and turn the pot to LOW.

Step Three! Leave it for 8 hours or so. You might check on it every now and then, but I usually just leave mine overnight.

Step Four! Once it's all nice and melty and the bits are brownish (I'm so technical, y'all), turn the crockpot off and let it sit and cool for a while.

Step Five! Strain it using a clean kitchen towel. I usually strain into a good stainless steel pot. Don't ever strain it into plastic. Newbie Me might have done that a few years back when I was just starting out with this stuff. (Shhhh. We don't speak of Newbie Me anymore. Plastic melts real fast, in case you didn't know.)

Make sure that your oil is a good temperature for this before you do it. It should be warm enough to stay liquid, but not hot enough to burn. You're going to want to squeeze your straining cloth, so if it's burning your hands, it's too hot.

Squeeze all the goodness out of the crispy bits and toss those in the trash or the compost or whatever. Some people say to eat them, and call them "cracklins", but I'm pretty sure those people are wrong. I have never been tempted to taste these gloppy, brown, weird looking remains, and I'm pretty sure "cracklin'" is actually made from a roasted pig's skin. Pig's skin = crackling. Leftover bits from making tallow = soggy and gross.

Step Six! Transfer strained tallow to a clean mason jar and affix a lid to the top. Label your richness and gaze at it in satisfaction.


I don't know exactly how long this lasts, but it is very shelf stable. I know I've kept mine at room temperature for at least a month and never had a problem with it going bad. If you're worried, of course you can always keep it in the fridge, although it will get rather harder in there. Your tallow should solidify as it cools and be a lovely, soft creamy white.


I use mine for sautéing, deep frying, and seasoning my pans mostly (do it properly and you will never have that first pancake stick ever again!). You could use it in baking, but I would recommend having some strong spices in whatever you're baking because it does have a definite beefy flavor to it. There is a specific type of lard that is supposed to be good for baking ("leaf lard", I think), and there is a very specific way to render it very carefully and slowly and specifically so that it is almost entirely devoid of piggy flavor, but I have yet to attempt anything like that. ^_^

Good luck in all your adventures, friends!


This post has been shared on the Homestead Barn Hop!

Thursday, October 9, 2014

Hutches

Finallyyyyyyyy! The long-awaited (by me) HUTCH update!!!


Winifred: "Wait, what? What are you doing? I thought I liked you, but you're not bringing food this time. What is that? Is it food? I don't think it's food. It's not green. Is it going to kill me? Sometimes not green things eat bunny things. Green things safe. Not green things bad. Except you. You're usually okay. If you bring food."

"Cordelia: "What is that? Food? Everything is Food, right? Food is all that matters in life. I only love you if you bring me Food. That better be Food. If it is Food, drop it in here and back away slowly. If you try to touch me while I'm dealing with Food, I will destroy you."


It took a long time, because...

1) There are SO MANY potential designs out there. Seriously. What's a wanna-be homesteader to think? Colony style? Digging? No digging? Moveable shelters that allow grazing? Stationary? Vermicompost underneath? Yea? Nay? Whaaaa??

2) I really don't know anything about building anything, at all, ever. Like I said before, I can use the measure-y thing. And maybe a screwdriver. Staple guns confuse me. And saws...are a little bit...scary.

3) I'm bad about remembering to go out and take pictures once the project is actually done.


In the end, I decided that a stationary structure is best for my current situation. My lawn is FULL of bumps and lumps and odd hills and holes, so it's really not practical to have a moveable "rabbit tractor". Once I finally decided that, the rest came together fairly easily, because I have an amazing, brilliant, perfect husband whose brain I was able to pick and whose skills I was able to take advantage of emulate.

He really is the best. He's been so patient with me during this project!

The tarp roof is meant to be temporary, as we just couldn't find barn tin anywhere at the time of construction. As it is though, I've been pretty pleased with the tarp. We've had a couple of good storms since they've been in this, and they've hardly gotten wet at all, even though the overhang isn't great. Hurrah!


I also decided against a colony-style setup, because of my undeniably controlling nature. I want to know exactly who breeds who, and whose babies are whose, and which mamas are best, etc. etc. I love taking notes on stuff like that. At the moment it kind of looks like a colony-style setup, but that's just because I haven't made the divider-thingy to go down the middle and split this into two cages.

Because I don't know how. Still waiting for the Darling Husband to have mercy on me with that one. :P

But you guys!! YOU GUYS! I HELPED MAKE THIS THING! It was super cool. I learned how to use a saw. Actually two different types of saws. I don't remember what they're called. One of them had a plug. Some of my cuts were less than perfect (read: my husband laughed. a lot.), but I DID IT. I feel liberated.

I also learned how to use the drill more effectively. Like, how to get it to make the screws go in. Instead of just stripping them out, followed by cursing.

Ahem.

Ohhh, and I hammered in staples. That was fun. I'm not so bad at hammer stuff.

This one looks pretty, so it was probably Tim's. :P


SO. Now all I have to do is get the divider in the middle (I didn't want it to be a permanent part of the structure, in case I ever want to make it big again), make some nest boxes, get another water bottle, and take the girls to meet their new boyfriend!! I'M SO EXCITED!!! :D

If things work out, and Winnie and 'Delia turn out to be good mamas, and rabbits do in fact turn out to be delicious, the next step will be for me to build another hutch and start looking for a good buck of my own!


This post was shared on the HomeAcre Hop and the Homstead Barn Hop!

Sunday, October 5, 2014

Dandelion Tincture

The dandelion is one of my favorite, favorite plants. Not delicious, not particularly beautiful. But I find it so very admirable for both its undeniable usefulness, and its remarkable tenacity.


I want to be just like the dandelion. Firm. Steadfast. Stubbornly pursuing its goal of conquering the world, improving the soil, and providing medicine to all those inclined to find it.

Every spring, I gather the dandelions that pop up in and around my garden, and make a dandelion tincture. This is really very simple, and it has benefitted me greatly when I remember to take it. The dandelion is very bitter, and very good for digestion. I have always struggled with my digestive system in general. Usually this involved me heavily abusing my guts while they cried out pitifully for an end to the corn syrup and manicotti, and retaliated with stomachaches, gas, and eventually, the destruction of my gallbladder.

Now, just so we're all on the same page. I'm not a doctor, or an herbalist, or a TCM expert, or any other kind of expert. I just know what has helped me personally. Dandelion is very good at encouraging the movement of bile, which can be very helpful if you struggle with constipation or sluggish digestion in general. Because of my gallbladder troubles, I know that I have certain challenges to face with my liver as well. Dandelion is excellent for both the liver and kidneys, and always, in my experience, encourages well-formed and regular bowel movements.

Didn't that sentence just make it sound so much more lovely than it is? "Well-formed and regular". Doesn't everybody want to be well-formed and regular? I know I do.

I'm sorry for talking about poop on my blog, y'all. It had to happen. I know some people have unresolved issues with poop. Perhaps there is a hidden trauma in your life that causes you to cringe involuntarily when you hear words like "feces", "manure", or "guano". My sincere apologies to everyone who hates poop (I'm sorry, Tim. Really!). I'm just going to say it a few more times to get it out of my system. POOP POOP POOPIDY POOOOOP POOP!

I have three boys. There is so much poop, and so much talk of poop in my life that it doesn't really phase me. I get to hear about all the different sizes, shapes, and personalities of my kids' poop every day. I also get to hear the name "Mr. Poop Butt" applied to myself, my grandmother, and pretty much everybody else we come in contact with at least a couple of times a week.

Anyway. Enough of that. Dandelion will help you poop. SO, if you have trouble pooping, just make this tincture and you will be able to have awesome poops every day without even thinking about it. And it's way easier than eating a dandelion salad every day, that's for sure.

First, gather some dandelions that have hopefully not been sprayed with chemicals, or peed on by the neighbor's dog (smelling them first helps to determine this). Try to get a few good roots among the leaves and flowers. Leaves and flowers are great, but the roots are seriously hardcore. This will be extremely evident when you try to extract them. They don't really like coming out of the ground.

Next, wash your dandelions to rid them of all excess dirt and creepy crawlies (there are a lot of places to hide on a dandelion, so try to be thorough! it helps if you have one of those sprayer thingies on your sink, as well as a vegetable scrubber for the roots).

Next, every bit of dandelion must be chopped into teensy, tiny pieces. You can do this by hand, which introduces what some have called "the human element" to your work. If you're in a good mood, and you have a lot of patience, and a lot of time, and you really want to feel that extra spark of productivity in your life, I absolutely recommend chopping by hand. There is something so wonderfully visceral about it.

If you are in a bad mood, or a stressed mood, or anything other than a fabulously bright and cheery mood, or if you suffer from bouts of extreme impatience, I recommend you leave that sort of human element out, and opt for the food processor. Instant gratification can be wonderful too. ;)

I have used both methods, and both have made good tinctures, so have at it with whatever you prefer!

After the herbs are all lovely and fragmented, transfer them to an available (clean) mason jar. Make sure that your jar is big enough, and that the plant isn't being packed in like brown sugar. The plant bits should have room to move and swirl around once you've added the vodka.

Which brings us to the next step...

Get yourself some good quality 80-100 proof vodka. If you can find and afford organic, great! If you can't, well...then you'll be like me and you can stare uncertainly at shelves and shelves of vodka until you grab one at random and pray that it wasn't made from GMO corn.

Pour the vodka over the dandelion until you have at least 1 inch of vodka above the herbs. Next, get a small piece of wax paper to put atop the jar, and put the lid tightly on top of that.

Now comes the fun part. It is beneficial to shake your tincture vigorously a couple of times a day. This encourages the extraction of awesome stuffs by the vodka, and speeds up the process in general. It is not required, but it is fun. After your tincture has been shaken, store it in a cool, dark cupboard for probably 3-6 weeks (honestly I can't remember the recommended time...my last tincture sat for probably 6 months, because I meant to do it that way forgot about it).


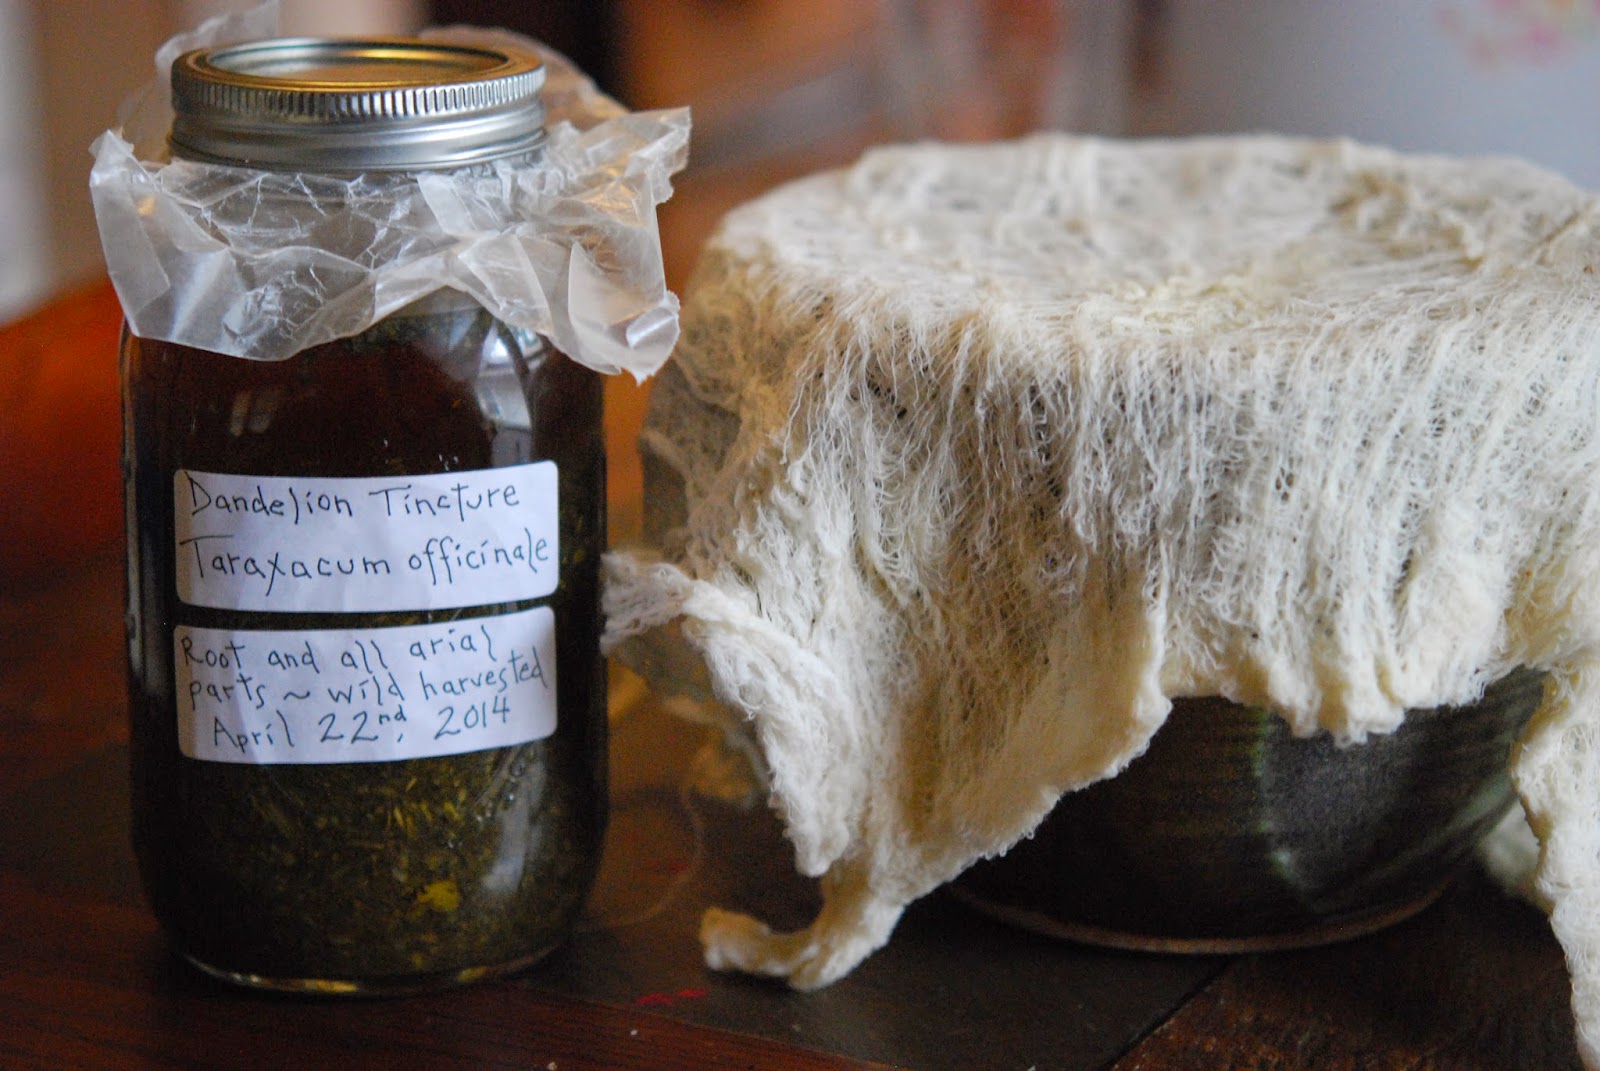
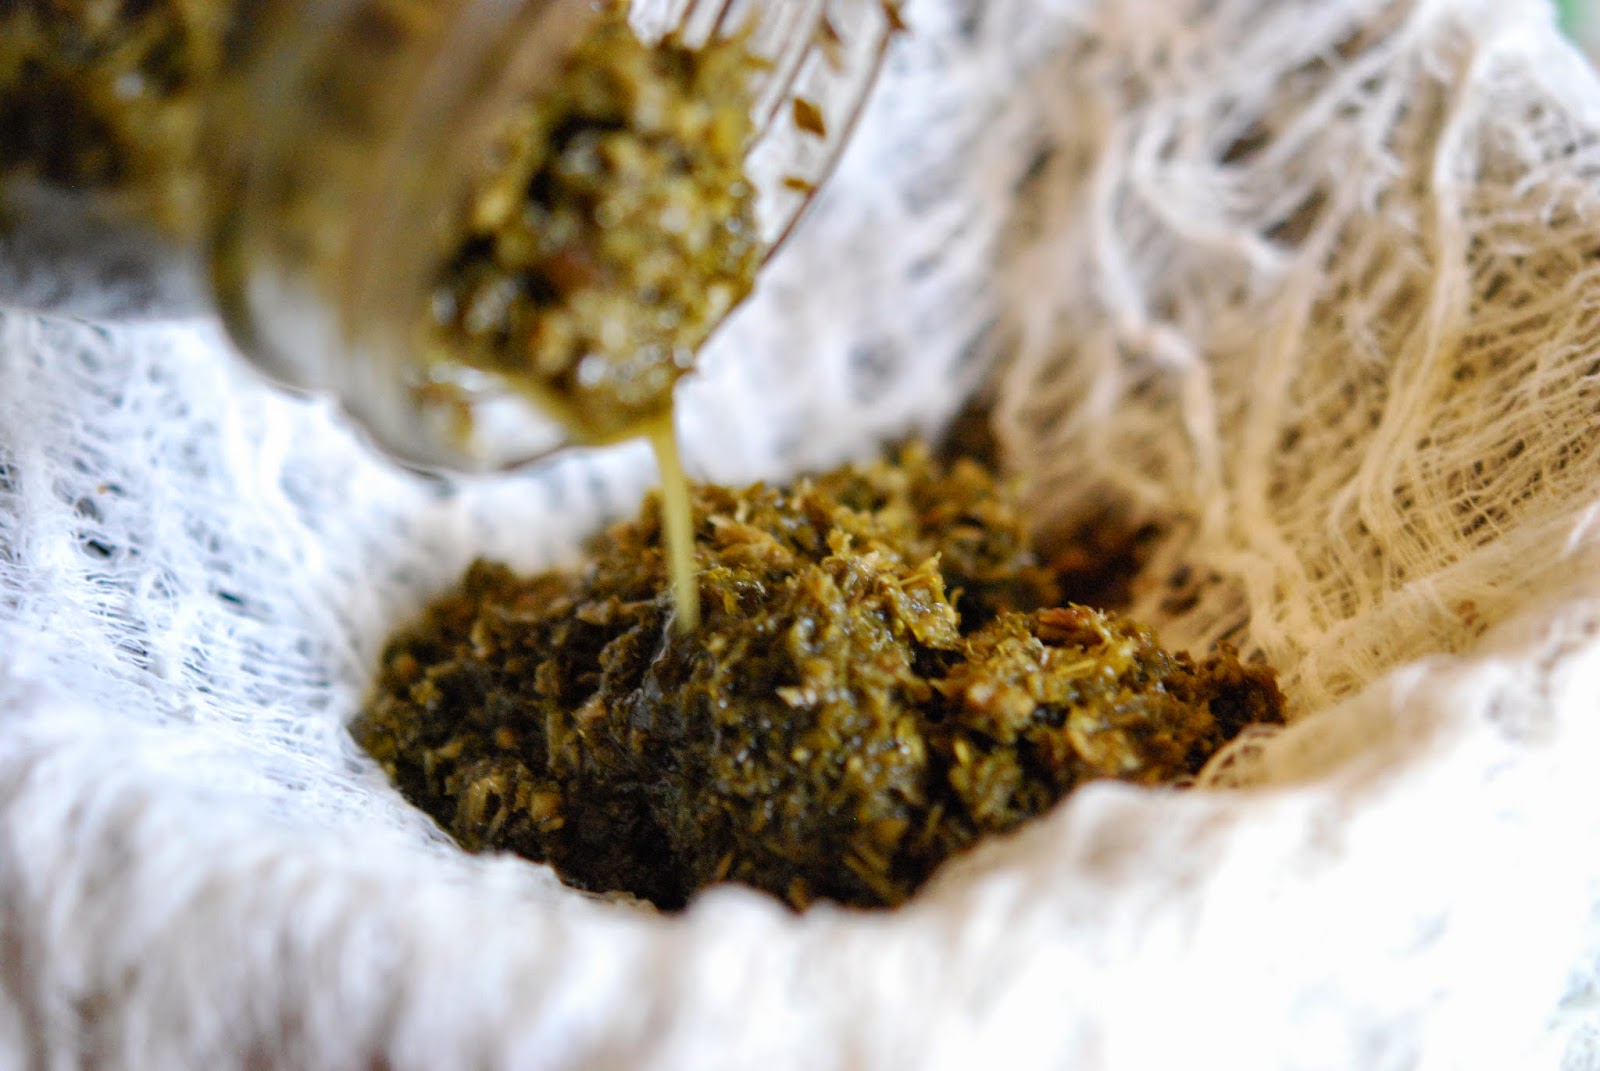
Once the 6 weeks are up, you need to strain your tincture and transfer it to an airtight bottle (preferably one that pours well). You can use a floursack towel for straining, or a nutmilk bag or cheesecloth or an old tshirt or whatever. Personally I think the floursack towel works best; I somewhat regretted using cheesecloth this time around.


Squeeze the marc (all the leftover plant bits) until you get every possible bit of goodness out of them.


Bottle the tincture (a simple flip-top bottle would work nicely), transfer labels (always label things, you guys. It's important), and you're done!

A good beginning dosage for an adult might be 30-60 drops 2-3 times a day. I estimate that 30 drops is around 1/4 teaspoon. I always mix mine with some water, because man...80-100 proof will burn your nosehairs out. Remember to always be cautious with dosages when trying something new. Dandelion is regarded as a fairly safe herb for nearly everybody, BUT...there are always those few who are sensitive. Start small and slow until you get an idea of what your body can handle. Everybody is different.

Store your tincture out of direct sunlight, and take daily or as needed! If you're going for daily, I recommend you take a day or a few days or a week off here and there. Balance is key. Find what helps you.

Happy pooping! ;D


This post has been shared on the Homestead Barn Hop and the HomeAcre Hop!

Thursday, October 2, 2014

Problem Salveng

Somebody told me that "Salve" is, despite its appearance, pronounced "Sahv". So now I'm going to revert to my rebellious 8 year old self and say: "WUT? THAT'S DUMB!". Which continues to be my opinion on much of the English language. And I was a grammar nerd, y'all. Lemme tell you. It just doesn't make sense. It's a twisty language. It likes to make you feel all comfy and safe and confident before popping out with a word like "Salve (sahv)" and laughing and jeering when you say it wrong.

English, you're a meanie-butt.

Regardless, I happen to know that in BRITAIN, where English STARTED, or something, people actually do occasionally pronounce the "L" in "Salve". So there. It's all YOU people that are saying it wrong. Not me. I meant to say it that way. On purpose. Because Britishes do.

AND NOW WE'RE GOING TO MAKE SOME. Ahem.

This week the kids are learning about insects, and thus, bees, and so I thought it would be the perfect time to make salves, so that they could see what beeswax looks like! Yay!

First, you need a double boiler.


Or, a super fancy pot on top of a pot. Ta-da!

Next, you need some herbal oils (oil that's had herbs soaking in it for a period of time) and some beeswax. Oh, and some cute little tins or somesuch to contain your finished product.

Now, if anybody wants an actual recipe, they should go here: Mountain Rose Herbs. That's for those of you who are into measuring and stuff. Because I'm queen of chaos, I winged it. But you don't have to. I strained my oil into the pot and then I added some beeswax until I thought to myself, "Ooo, yes. That looks good. I think that's enough. Well done, self!" and then I melted them together on my super fancy double boiler.


My oils might have been soaking for a while longer than recommended. I might have forgotten that they existed until today. Maybe.


The kids had fun stirring, and then when it was melted together I poured it into my little tins (which I've had floating around the house for ages, just waiting for a purpose). It seems to have worked quite well, despite my aversion to measuring. I was rather pleased with the results! I made a simple plantain salve for things like stings and burns, and then a big batch with a mixture of comfrey (leaf...I haven't dug up my roots yet, lol), lavender, catnip, and plantain, which should be good for bruises and the like. It made a LOT for such a small amount of beeswax, which I think was the most expensive ingredient.


Hurrah! Easy peasy. Boo-boos begone!

This post was shared on the HomeAcre Hop!